Tuesday, March 26, 2019

Paper Pumpkin Possibilities Poppin' Birthday


Image may contain: text

Welcome to the Paper Pumpkin Possibilities Blog Hop!

We are all fans of this monthly crafting kit and want to share with you our enthusiasm for this box of fun and creativity. The beauty of the Paper Pumpkin kit is that you can follow the directions provided in the kit and make the projects as they were designed or use the supplies as a starting point and let your creativity run wild. On this hop we will be sharing lots of ideas with you on how to use this March Paper Pumpkin kit: "Poppin Birthday". This kit makes 8 cards with pop out images and here's my alternate project.


Images©Stampin' Up

If you love Pop-up cards,then this is the kit for you!
Checkout these super cute cards with a Pop!
Images©Stampin' Up

Are you currently a Paper Pumpkin subscriber? If not, now is a great time to join in the fun, especially during Sale-a-bration! Sale-a-bration is the only time of year you can receive extra free product for purchasing a 3, 6 or 12 month pre-paid subscription. Contact your demonstrator to get started or CLICK HERE* to subscribe by March 31st to get this great offer!

 01.03.19_HEADER_PP_SAB_2019

In April, Paper Pumpkin we have something entirely new: Distinktive stamping. Distinktive stamps give you photo-realistic images with just one stamp, the result is breathtaking. Subscribe by April 10th and get this kit with 9 cards and an adorable gift box.

04.01.19_HEADER_PP_DISTINKTIVE

Thank you for joining us as we share with you the possibilities of paper pumpkin, now hop over to Shirley's blog to see her cute creation.

No photo description available.

If you're new to stamping or don't already have a designated demonstrator... I would love the opportunity to share this journey with you. Join Renee's Paper Gems by 
March 31st and get $175 worth of Stampin Up product for $99.


Thank you for stopping by to read my blog.
Happy crafting to you!


Follow me on Facebook and Instagram

Tuesday, February 26, 2019

Paper Pumpkin Pop Up Blog Hop Grown With Kindness

Image may contain: text

Welcome to the Paper Pumpkin Pop Up Blog Hop!

We are all fans of this monthly crafting kit and want to share with you our enthusiasm for this box of fun and creativity. The beauty of the Paper Pumpkin kit is that you can follow the directions provided in the kit and make the projects as they were designed or use the supplies as a starting point and let your creativity run wild. On this hop we will be sharing lots of ideas with you on how to use this February Paper Pumpkin kit: Grown with Kindness.

The kit makes 9 cards and it has photo-realistic images  Here's the project I made.

Images©Stampin' Up
    If you love succulents, then this is the kit for you!
    Checkout the beautiful succulents in this kit! 

    Images©Stampin' Up

    Are you currently a Paper Pumpkin subscriber? If not, now is a great time to join in the fun, especially during Sale-a-bration! Sale-a-bration is the only time of year you can receive extra free product for purchasing a 3, 6 or 12 month pre-paid subscription. Contact your demonstrator to get started or CLICK HERE* to subscribe. 

     01.03.19_HEADER_PP_SAB_2019

    Paper Pumpkin is turning six and we want to celebrate with you! After all, we could not have shared all these years of creativity if it weren’t for our demonstrators and subscribers.

    To celebrate this fun occasion and to thank everyone who supports Paper Pumpkin month after month, we’re offering a specially-designed March kit and a FREE STAMP SET. Oh, yes. You read that right. In March, you will receive TWO stamp sets with your Paper Pumpkin kit.  Subscribe by March 10th and get this specially designed box delivered to your mailbox.
    02.05._PP_06_DEMO_LANDING_HEAD

    Thank you for joining us as we share with you the possibilities of paper pumpkin, now hop over to Debbi's blog to see her cute creation.
    Next
    If you are new to stamping or don’t already have a designated demonstrator… I would love the opportunity to earn your business. Please use February Host Code: GW2K3W6B on all orders up to $150.00 and receive a complimentary gift from me. Click here to get your complimentary gift.


    Thank you for stopping by to read my blog.
    Happy crafting to you!


    Follow me on Facebook and Instagram

    Saturday, February 23, 2019

    Saturday Spotlight: Stampin' Up! "Sprinkle With Love"


    Sprinkle with Love featuring Stampin’ Up “Hello Cupcake” Stamp Set

    These cards were created with three different types of crafters: Beginner, Casual and Avid.  Each card started with the basics:  block, ink, paper and stamp set. I hope you like the projects and it gives your creative spirit a boost. Don’t forget to decorate your envelope also.
    Beginner
    Casual
    Avid


    Team's Weekly Challenge: Color

    Card measurements: 4 1/4" x 5 1/2"


    Supplies:

    Hello Cupcake Stamp Set
    Whisper White Card Stock 
    Crumb Cake Card Stock 
    Crumb Cake Ink Pad 
    Early Espresso Ink Pad 
    Petal Pink Ink Pad 
    Story Label Punch
    Share What You Love Artisan Pearls 
    Block D
    Snail Adhesive 
    Dimensionals 


    Instructions:

    Beginner: Stamping 101
    Cut card base 8.5" x 5.5", score @ 4.25"
    Create the sprinkle border using the sprinkle stamp and the D block
    Stamp the cupcake image on card base using the ink pads.
    Stamp sentiment on card. Add sprinkles to top of cupcake.
    Voila your card is finished.

    Casual: Stepping your Stamping up a notch
    Cut card base 8.5" x 5.5", score @ 4.25"
    Cut whisper white card stock 3” x 3”
    Create the sprinkle border using the sprinkle stamp and the D block
    Stamp the top of the cupcake image on small piece of whisper white card stock.
    Using scissor hand cut cupcake top.
    Stamp bottom of cupcake on card base.
    Attach cupcake to cupcake bottom with dimensionals.
    Stamp sentiment on card. Add sprinkles and a pearl to the top of cupcake.
    Voila your card is finished.

    Avid: Let Your Creative Spirit Soar!
    Cut card base 8.5" x 5.5", score @ 4.25"
    Cut crumb cake card stock 3” x 3”
    Create the sprinkle border using the sprinkle stamp and the D block
    Stamp the cupcake image on card base using the ink pads.
    Stamp sentiment on crumb cake card stock and cut with story label punch.
    Attach sentiment to card base using dimensionals. Add sprinkles to top of cupcake. Add pearls to sentiment layer and card base for that extra bling!
    Voila you card is finished.


    Spend a minimum of $30.00 in my online store and using the

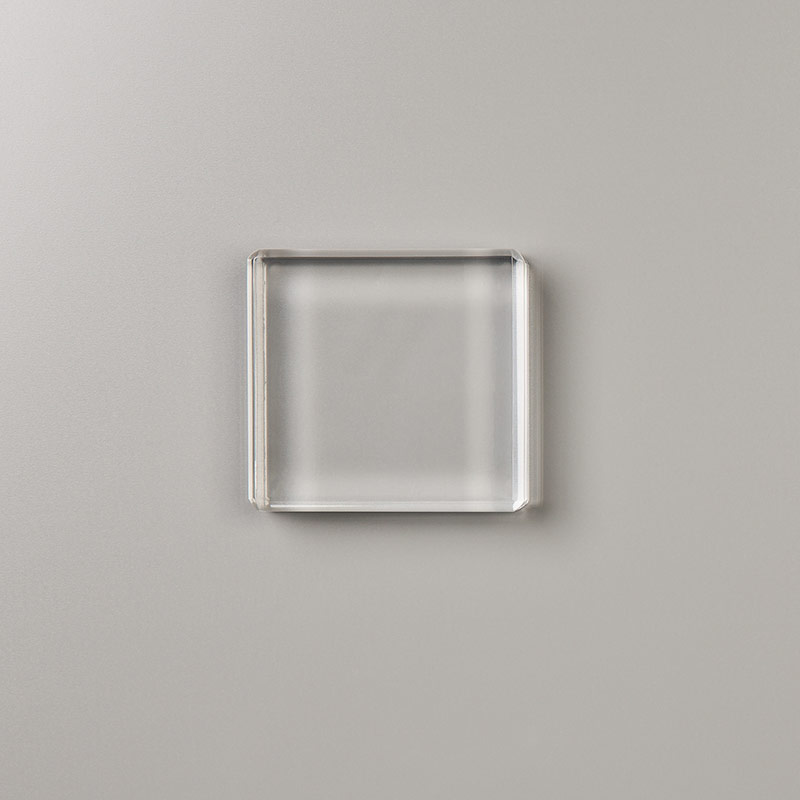
    February Host Code: GW2K3W6B and get a free Clear Block D.

    Bump of your order to $50.00 and earn  FREE Sale-a-bration products while supplies last!


    Sign up for my newsletter and get 10% off of one item in my Online Store!


    Thank you for stopping by to read my blog.
    Happy crafting to you!

    Follow me on Facebook and Instagram


    Wednesday, February 13, 2019

    Hostess Wanted

    Must love free crafting supplies and fun with friends.
    No experience necessary-just willing to get creative!


    Images©Stampin' Up
    How it works!
    Contact me
    Set a date and make a plan!
    Invite your friends
    It's your party time! Enjoy yourself
    Get spoiled and enjoy your rewards
    Keep crafting

    Host Reward!!!
    Hos Rewards Chart
    Images©Stampin' Up


    Contact me to book your private class:
    Charmane Hopkins, Independent Stampin’ Up Demonstrator
    713-201-8570


    Thank you for stopping by to read my blog.
    Happy crafting to you!


    Follow me on Facebook and Instagram


    Saturday, February 9, 2019

    Saturday Spotlight: Stampin " Up Foil Sheets

    Stampin' Up! Sending "Love and Hugs to You" featuring the Sale-a-bration Foil Sheets


    Team's Weekly Challenge: Love

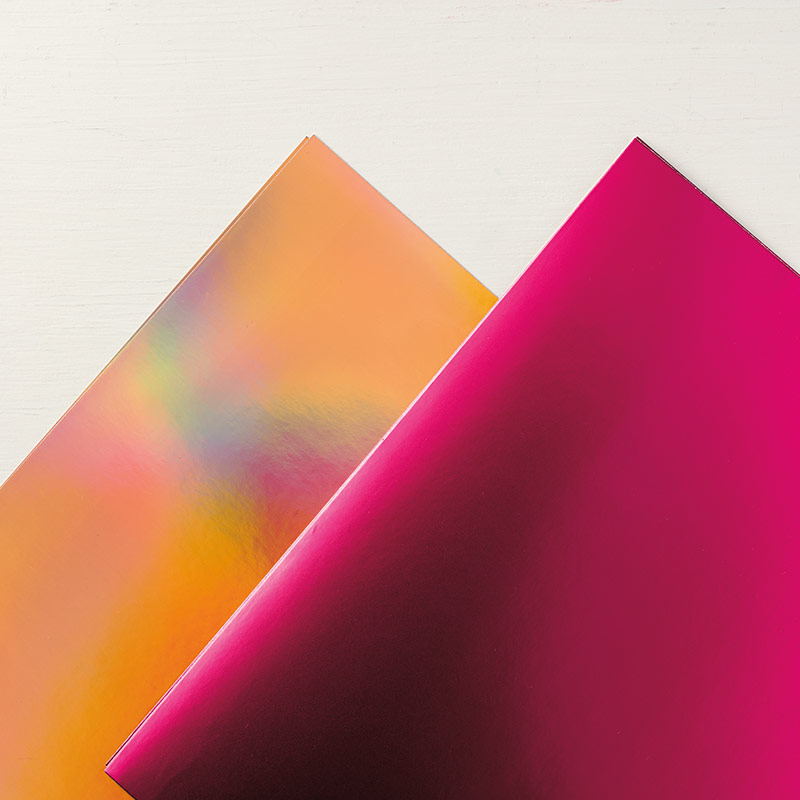
    Our team's weekly challenge was to create a project using Love as the theme. I choice to spotlight the "Sale-a-bration Foil Sheets" using the Ribbon of Courage stamp set. The foil sheets comes in two colors: Grapefruit Grove and Lovely Lipstick. I really love the brilliance of the colors. I decided to use the lovely lipstick foil sheet because it's a great compliment to the "all My Love" designer series paper.


    Card measurements: 4 1/4" x 5 1/2"

    Supplies:
    Ribbon of Courage Stamp Set 148708
    Whisper White Card Stock 100730
    All My Love Designer Series Paper (DSP) 148576 
    Lovely Lipstick Ink Pad 147140
    Starburst Punch 143717
    2" Circle Punch 133782
    Cookie Cutter Punch 140396
    Snail Adhesive 104332
    Dimensionals 104430


    Instructions:
    1. Cut card base 8.5" x 5.5", score @ 4.25"
    2. Cut designer series paper (dsp) 2" x 5 1/2"
    3. Cut a 3' x 3" piece of whisper white card stock and the lovely lipstick foil sheet
    4. Cut sentiment layer using the circle punch and cut foil sheet layer using the starburst punch. 
    5. Cut 1/2" strip of the lovely lipstick foil sheet and attach to the dsp.
    6. Assemble card as shown in the picture above.
    7.  Add dimensional to sentiment layer and attach to card. Give your card that extra wow with foil hearts made using the cookie cutter punch and glue dots.
    Voila your project is complete.


    Spend a minimum of $30.00 in my online store and using the
    February Host Code: GW2K3W6B and get a free Clear Block D.


    Images©Stampin' Up!


    Bump of your order to $50.00 and get the
     Grapefruit Grove & Lovely Lipstick Foil Sheets 149712 during Sale-a-bration


    Images©Stampin' Up!

    Sign up for my newsletter and get 10% off of one item in my OnlineStore!


    Thank you for stopping by to read my blog.
    Happy crafting to you!

    Follow me on Facebook and Instagram

    Tuesday, January 29, 2019

    Paper Pumpkin Pop Up Blog Hop Be Mine Valentine

    Image may contain: text

    Welcome to the Paper Pumpkin Pop Up Blog Hop!

    We are all fans of this monthly crafting kit and want to share with you our enthusiasm for this box of fun and creativity. The beauty of the Paper Pumpkin kit is that you can follow the directions provided in the kit and make the projects as they were designed or use the supplies as a starting point and let your creativity run wild. On this hop we will be sharing lots of ideas with you on how to use this January Paper Pumpkin kit: Be Mine Valentine.

    The kit makes 24 super cute Valentine's Treat Pillow boxes and it also coordinates with the Animal Outing bundle in the Stampin' Up! annual catalog. This is my first hop and I would like to share with you the cute project I decided to make. I chose to spotlight the Animal Expedition Designer Series paper and the Animal Outing Stamp set.  Here's two of the projects I made.

    Created by Charmane Hopkins
    Images©Stampin' Up
    Images©Stampin' Up

    Card Measurements: 3" x 3"

    Additional Supplies:
    Melon Mambo Card Stock
    Lemon Lime Twist Card Stock
    Whisper White Card Stock
    Animal Expedition Designer Series Paper
    3" x 3" Envelopes
    Memento Black Ink
    Melon Mambo Stampin Write Marker
    Lemon Lime Twist Stampin Write Marker
    Classic Label Punch
    Stitched Shape Framelits
    Big Shot
    Snail adhesive
    Dimensionals


    Instructions
    • Cut Melon Mambo card stock 3" x 6", then fold in half to make the 3"x 3" card.
    • Cut designer series paper (DSP) 2 7/8" x 2 7/8" 
    • Cut a 2 5/8" stitched square using the whisper white card stock and stamp bird image using the black memento ink.
    • Stamp sentiment from kit on a piece of whisper white scrap cut using the classic label punch.
    • Use Stampin Write markers to color images on stitched square and envelopes.
    • Attach DSP to card base with snail adhesive and pop up additional layers using dimensionals. 
    • Add enamel shapes and matching envelope to give your card that extra bling!

    Checkout this cute Be Mine Valentine kit, it's adorable!!


    Are you currently a Paper Pumpkin subscriber? If not, now is a great time to join in the fun, especially during Sale-a-bration! Sale-a-bration is the only time of year you can receive extra free product for purchasing a 3, 6 or 12 month pre-paid subscription. Contact your demonstrator to get started or CLICK HERE* to subscribe. 

    01.03.19_HEADER_PP_SAB_2019

    Thank you for joining us as we share with you the possibilities of paper pumpkin, now hop over to Anastasia's blog to see her fun creation. 
    No photo description available.
    If you are new to stamping or don’t already have a designated demonstrator… I would love the opportunity to earn your business. Please use January Host Code: CKJKWS3N on all orders up to $150.00 and receive a complimentary gift from me. Click here to get your complimentary gift.


    Thank you for stopping by to read my blog.
    Happy crafting to you!


    Follow me on Facebook and Instagram


    Saturday, January 12, 2019

    Saturday Spotlight: Stampin' Up! "I Just Adore You"

    Stampin' Up! I Just Adore You featuring the "Incredible Like You" Stamp Set

    Images©Stampin' Up!

    Team's Weekly Challenge: Occasion Catalog

    Our team's weekly challenge was to create a project using new product from Stampin' Up! 2019 Occasion Catalog. I choice to spotlight the "Incredible Like You" stamp set and my favorite color purple. This stamp set is a two-step stamping and comes with 15 stamps (4 sentiments and 11 images). The sentiment font is super cute and will be the star of any project. Stampin' Up! paired this stamp set with the "Incredible Like You Project Kit" but it's also perfect alone. 


    Card measurements: 4 1/4" x 5 1/2"

    Supplies:


    Incredible Like You Stamp Set 148708
    Whisper White Card Stock 100730
    Gorgeous Grape Card Stock 146987
    Highland Heather Card Stock 146986
    Gorgeous Grape Ink Pad 147099
    Highland Heather Ink Pad 147103
    Pineapple Punch Ink Pad 147141
    Lovely Lipstick Ink Pad 147140
    Lovely Lipstick Ribbon 146952
    Happiness Blooms Enamel Dots 148805
    Starburst Punch 143717
    2" Circle Punch 133782
    Snail Adhesive 104332
    Dimensionals 104430


    Instructions:
    1. Cut card base 8.5" x 5.5", score @ 4.25"
    2. Cut whisper white card stock 4 1/8" x 5 3/8" &  3" x 3"
    3. Cut highland heather card stock 3" x 3"
    4. Create custom designer series paper using the Incredible Like You stamp set and the two-step stamping technique.
    5. Stamp sentiment on small whisper white piece.
    6. Cut sentiment layer using the circle punch and cut highland heather layer using the starburst punch. 
    7. Attach custom layer to card-base using snail adhesive. Attach sentiment to layer to highland heather layer using snail adhesive.
    8. Cut a piece of the lovely lipstick ribbon and attach to the bottom of the sentiment layer using snail adhesive. 
    9. Add dimensional to sentiment layer and attach to card. Give your card that extra wow with pineapple punch enamel dots.
    Voila your project is complete.


    Spend a minimum of $30.00 in my online store and using the
     January Host Code: CKJKWS3N and get a free spool of Calypso Coral Ribbon.

    Images©Stampin' Up!
    Sign up for my newsletter and get 10% off of one item in my OnlineStore!


    Thank you for stopping by to read my blog.
    Happy crafting to you!

    Follow me on Facebook and Instagram


    September 2026 PPP Aspens of Gratitude Blog Hop

                              Welcome to the Paper Pumpkin Possibilities Blog Hop! We are all fans of this monthly crafting kit and want to shar...