Happy Birthday


Images©Stampin' Up
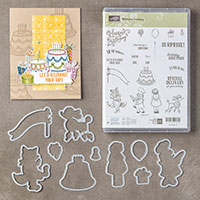
The inspiration to create these two cute birthday cards came from our team's sketch challenge. Every two weeks we're giving a new sketch to inspire and help us create. This inspiration comes from sketch number 5. I chose to feature Stampin' Up's "Birthday Delivery" Stamp set. I really like how you're able to create custom designer paper with some of the stamps. This stamp set comes in a bundle but for this project I only used the stamp set.
 |
| Images©Stampin' Up |
Card Measurements: 4.25" x 5.5"
Supplies:
Birthday Delivery Stamp Set 143360
Whisper White Cardstock 101650
Sweet Sugarplum Cardstock 141418
Pacific Point Cardstock 111350
Berry Burst Cardstock 144243
Lemon Lime Twist Cardstock 144245
Sweet Sugarplum Ink Pad 141395
Pacific Point Ink Pad 126951
Berry Burst Ink Pad 144083
Lemon Lime Twist Ink Pad 144086
Pumpkin Pie Ink Pad 126945
Daffodil Delight Ink Pad 126944
Layering Square Framelits Dies 141708
Sparkle Embossing Folder 141468
Bigshot Die Cutting Machine 143263
Brights Enamel Shapes 141680
Fast Fuse 129026
Dimensionals 104430
Cutting
Card base: Whisper White 8.5 " x
5.5", score@4.25" (2)
Whisper White Cardstock 4" x
6" (2)
Pacific Point Cardstock 4" x 6"
Sweet Sugarplum Cardstock 4" x 6"
Berry Burst Card Stock 4" x 6"
Lemon Lime Twist Cardstock 4" x 6"
Stamping, embossing and die-cutting:
Create custom designer series paper using the Birthday Delivery stamp set on one piece of whisper white cardstock. On the other piece stamp the sentiment. Using the 3" scalloped square die and cut the berry burst burst and lemon lime twist cardstock. Stamp sentiment on the other piece of whisper white cardstock and use the 2 7/8" square die to cut out. To give sentiment layer an extra pop stamp birthday present image. Use Sparkle embossing folder on the Pacific Point and Sweet Sugarplum cardstock.
Assemble:
Use the fast fuse adhesive to attach the embossed cardstock to the card base. Use adhesive to layer designer series paper according to the picture. Use adhesive to attach sentiment square to scalloped die cut square. Using dimensionals to attach the sentiment layer to card base. Add six enamels shapes (3 on top & 3 on the bottom). This will give the card that extra bling! Woohoo another cute project completed.
Wouldn't you love to give someone this handmade, heartfelt birthday card.
Join my team and let me share with you how to make this cute card!
Thank you for visiting my blog!
Happy crafting to you!


No comments:
Post a Comment